5 Easy Ways To Cook Eggs
FOODS

These are just a few of the many ways to cook eggs. There are endless possibilities, so feel free to experiment and find your favorite way to cook them.
PHOTO:CAITLIN BENSEL; FOOD STYLIST: TORIE COX
5 Easy Ways To Cook Eggs
1. Hard-boiled eggs
Hard-boiled eggs are a timeless favorite, offering a convenient and nutritious option for snacks, salads, or quick meals. They're packed with protein, vitamins, and minerals, making them a healthful addition to any diet. Here's a simple and foolproof method to achieve perfectly cooked hard-boiled eggs every time.
Ingredients
2 large eggs
Water
Instructions
Prepare the Eggs:
Place the eggs in a saucepan and cover them with cold water. Ensure the water level is about 1 inch above the eggs to allow for even cooking.
Bring to a Boil:
Place the saucepan on the stove over high heat and bring the water to a full rolling boil.
Simmer and Cover:
Once the water is boiling, remove the saucepan from the heat and cover it with a lid. This step is crucial to prevent the eggs from cracking due to rapid temperature changes.
Set the Timer:
Let the eggs sit in the hot water for about 10-12 minutes. This duration ensures that the yolks are fully cooked and the whites are firm.
Cool Down:
After the timer goes off, carefully drain the hot water from the saucepan. To cool the eggs quickly and stop the cooking process, run cold water over the eggs or transfer them to an ice bath.
Peel and Enjoy:
Once the eggs are cool enough to handle, gently tap them on a hard surface to crack the shells. Peel the shells under running water to make the process easier. Your hard-boiled eggs are now ready to be enjoyed!
Tips for Perfect Hard-Boiled Eggs
Use Fresh Eggs: Fresh eggs can be more challenging to peel. If you're having trouble, try using eggs that are a few days old.
Ice Bath: Placing the eggs in an ice bath immediately after cooking can help prevent the formation of a greenish-gray ring around the yolk, which is caused by overcooking.
Storage: Hard-boiled eggs can be stored in the refrigerator for up to one week. To keep them fresh, place them in an airtight container or wrap them individually in plastic wrap.
Serving Suggestions
Hard-boiled eggs are incredibly versatile. Here are a few ways to enjoy them:
Snack: Sprinkle with a pinch of salt and pepper for a quick and satisfying snack.
Salad Topping: Slice or chop the eggs and add them to your favorite salad for extra protein and flavor.
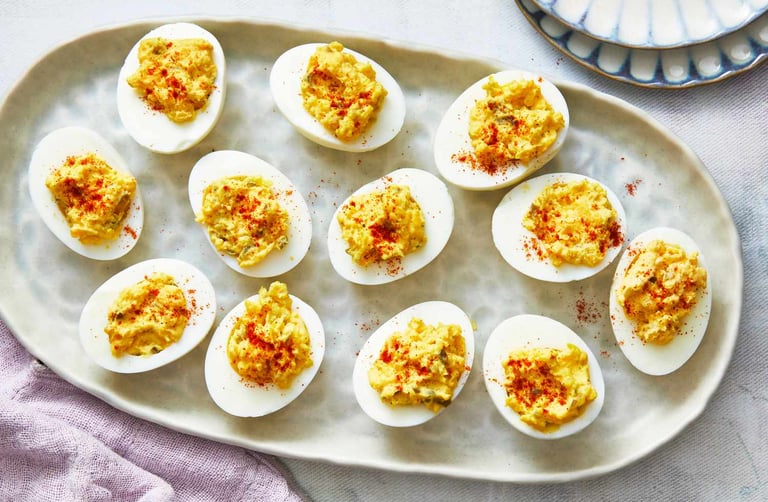
Deviled Eggs: Halve the eggs, remove the yolks, and mix them with mayonnaise, mustard, and your choice of seasonings. Spoon the mixture back into the egg whites for a delicious appetizer.
Hard-boiled eggs are a simple yet nutritious option that can be enjoyed in countless ways. With these easy steps, you'll have perfectly cooked hard-boiled eggs ready to enjoy in no time. Happy cooking!
2. Soft-boiled eggs
Soft-boiled eggs are a delightful treat that combines the best of both worlds: a firm white and a creamy, runny yolk. They're perfect for dipping toast soldiers or adding a luxurious touch to ramen and other dishes. Here's how to achieve the perfect soft-boiled egg every time.
Ingredients
2 large eggs
Water
Ice (for ice bath, optional)
Instructions
Prepare the Eggs:
Gently place the eggs in a saucepan and cover them with cold water. Ensure the water level is about 1 inch above the eggs to allow for even cooking.
Bring to a Boil:
Place the saucepan on the stove over high heat and bring the water to a full rolling boil.
Add the Eggs:
Once the water is boiling, carefully lower the eggs into the saucepan using a spoon. Be gentle to avoid cracking the shells.
Cook the Eggs:
Reduce the heat to medium-low and let the eggs cook for about 6-7 minutes. This duration will give you a firm white and a creamy, runny yolk. For a slightly firmer yolk, cook for an additional 1-2 minutes.
Prepare an Ice Bath (Optional):
While the eggs are cooking, prepare an ice bath by filling a bowl with ice and cold water. This step helps to stop the cooking process and makes the eggs easier to handle.
Cool Down:
Once the eggs are cooked to your desired consistency, use a slotted spoon to carefully remove them from the hot water. Transfer them to the ice bath for about 1-2 minutes to cool them down quickly.
Serve:
Gently tap the eggs on a hard surface to crack the shells, and peel them under running water if desired. Serve the soft-boiled eggs immediately while they're still warm.
Tips for Perfect Soft-Boiled Eggs
Use Fresh Eggs: Fresh eggs can be more challenging to peel. If you're having trouble, try using eggs that are a few days old.
Timing is Key: The cooking time for soft-boiled eggs is crucial. For a runny yolk, aim for 6-7 minutes. For a slightly firmer yolk, cook for 8-9 minutes.
Ice Bath: Placing the eggs in an ice bath immediately after cooking helps to stop the cooking process and makes the eggs easier to handle.
Serving Suggestions
Soft-boiled eggs are incredibly versatile. Here are a few ways to enjoy them:
Toast Soldiers: Serve the soft-boiled eggs with toast soldiers for a classic and delicious breakfast.
Ramen: Add a soft-boiled egg to a bowl of ramen for a luxurious and comforting meal.
Salad: Halve the eggs and add them to your favorite salad for extra protein and flavor.
Soft-boiled eggs are a simple yet indulgent option that can be enjoyed in countless ways. With these easy steps, you'll have perfectly cooked soft-boiled eggs ready to enjoy in no time. Happy cooking!
3. Scrambled eggs
Scrambled eggs are a timeless breakfast classic, loved for their creamy texture and rich flavor. They're quick to make, versatile, and can be customized with a variety of ingredients to suit your taste. Here's how to achieve the perfect scrambled eggs every time.
Ingredients
2 large eggs
1 tablespoon butter
Salt and pepper to taste
Optional: cheese, herbs, vegetables, or other mix-ins
Instructions
Prepare the Eggs:
Crack the eggs into a bowl and whisk them until the yolks and whites are fully combined. For extra creamy scrambled eggs, you can add a splash of milk or cream.
Heat the Pan:
Heat a non-stick skillet over medium-low heat and add the butter. Allow the butter to melt and coat the pan evenly.
Cook the Eggs:
Once the butter is melted and bubbly, pour in the whisked eggs.
Let the eggs sit for a few seconds until they start to set around the edges.
Using a spatula, gently push the eggs from one side of the skillet to the other, forming soft curds.
Continue cooking, stirring gently, until the eggs are cooked to your desired consistency. For creamy scrambled eggs, remove them from the heat just before they're fully set, as they will continue to cook from residual heat.
Season and Customize:
Season the eggs with salt and pepper.
Add any optional ingredients like cheese, herbs, vegetables, or other mix-ins. Stir gently to combine.
Serve:
Transfer the scrambled eggs to a plate and serve immediately while they're still warm and creamy.
Tips for Perfect Scrambled Eggs
Low and Slow: Cooking scrambled eggs over low to medium-low heat ensures a creamy and tender texture. High heat can cause the eggs to become rubbery.
Stir Gently: Stirring the eggs gently and frequently helps to create soft curds and prevents the eggs from overcooking.
Butter is Best: Using butter instead of oil adds a rich flavor and helps to create a creamy texture.
Serving Suggestions
Scrambled eggs are incredibly versatile. Here are a few ways to enjoy them:
Classic Breakfast: Serve scrambled eggs with toast, bacon, and fresh fruit for a classic and satisfying breakfast.
Breakfast Burrito: Wrap scrambled eggs in a tortilla with cheese, salsa, and avocado for a delicious and portable meal.
Eggs Benedict: Top English muffins with scrambled eggs, ham, and hollandaise sauce for a luxurious brunch dish.
Scrambled eggs are a simple yet delicious option that can be enjoyed in countless ways. With these easy steps, you'll have perfectly cooked scrambled eggs ready to enjoy in no time. Happy cooking!
4. Sunny-side up eggs
Sunny-side up eggs are a beloved breakfast staple, known for their runny yolks and crispy edges. They're quick to make and pair perfectly with a variety of sides. Here's how to achieve the perfect sunny-side up eggs every time.
Ingredients
2 large eggs
1 tablespoon butter or oil
Salt and pepper to taste
Optional: fresh herbs or a sprinkle of cheese
Instructions
Heat the Pan:
Heat a non-stick skillet over medium heat and add the butter or oil. Allow the butter to melt and coat the pan evenly.
Crack the Eggs:
Once the butter is melted and bubbly, carefully crack the eggs into the skillet. Be gentle to avoid breaking the yolks.
Cook the Eggs:
Let the eggs cook undisturbed until the whites are set but the yolks are still runny. This should take about 2-3 minutes.
For a slightly firmer white, you can cover the skillet with a lid for the last minute of cooking to trap the heat and steam the tops of the eggs.
Season and Serve:
Season the eggs with salt and pepper.
Using a spatula, carefully lift the eggs from the skillet and transfer them to a plate.
Add any optional toppings like fresh herbs or a sprinkle of cheese.
Serve the sunny-side up eggs immediately while they're still warm.
Tips for Perfect Sunny-Side Up Eggs
Low and Slow: Cooking sunny-side up eggs over medium heat ensures that the whites set evenly without overcooking the yolks.
Cover for Extra Fluffiness: Covering the skillet with a lid for the last minute of cooking can help to steam the tops of the eggs, creating a fluffier texture.
Butter is Best: Using butter instead of oil adds a rich flavor and helps to create a crispy, golden edge on the eggs.
Serving Suggestions
Sunny-side up eggs are incredibly versatile. Here are a few ways to enjoy them:
Classic Breakfast: Serve sunny-side up eggs with toast, bacon, and fresh fruit for a classic and satisfying breakfast.
Avocado Toast: Top a slice of toasted bread with mashed avocado and a sunny-side up egg for a delicious and nutritious meal.
Breakfast Tacos: Wrap sunny-side up eggs in a tortilla with salsa, cheese, and avocado for a flavorful and portable breakfast.
Sunny-side-up eggs are a simple yet delicious option that can be enjoyed in countless ways. With these easy steps, you'll have perfectly cooked sunny-side up eggs ready to enjoy in no time. Happy cooking!
5. Omelet
An omelette is a classic and versatile dish that can be customized with a variety of fillings to suit your taste. Whether you prefer a simple cheese omelette or a more elaborate one with vegetables, meats, and herbs, this method will help you achieve the perfect omelette every time.
Ingredients
2 large eggs
1 tablespoon butter
Salt and pepper to taste
Optional fillings: cheese, vegetables (e.g., bell peppers, onions, spinach), herbs (e.g., chives, parsley), meats (e.g., ham, bacon), or other mix-ins
Instructions
Prepare the Eggs:
Crack the eggs into a bowl and whisk them until the yolks and whites are fully combined. For extra fluffy omelettes, you can add a splash of milk or water.
Prepare the Fillings:
If using vegetables, meats, or other fillings that require cooking, prepare them in advance. Sauté vegetables until tender, cook meats until done, and chop any herbs or other ingredients as needed.
Heat the Pan:
Heat a non-stick skillet over medium heat and add the butter. Allow the butter to melt and coat the pan evenly.
Cook the Omelette:
Once the butter is melted and bubbly, pour in the whisked eggs.
Let the eggs sit for a few seconds until they start to set around the edges.
Using a spatula, gently push the eggs from one side of the skillet to the other, forming soft curds.
Once the eggs are mostly set but still slightly runny on top, spread your desired fillings evenly over one half of the omelette.
Fold and Cook:
Using the spatula, carefully fold the other half of the omelette over the fillings.
Cook for an additional 1-2 minutes until the eggs are fully set and the cheese (if using) is melted.
Season and Serve:
Season the omelette with salt and pepper.
Slide the omelette onto a plate and serve immediately while it's still warm.
Tips for Perfect Omelettes
Low and Slow: Cooking omelettes over medium heat ensures that the eggs cook evenly without burning.
Stir Gently: Stirring the eggs gently and frequently helps to create soft curds and prevents the eggs from overcooking.
Butter is Best: Using butter instead of oil adds a rich flavor and helps to create a crispy, golden edge on the omelette.
Serving Suggestions
Omelettes are incredibly versatile. Here are a few ways to enjoy them:
Classic Cheese Omelette: Fill the omelette with your favorite cheese, such as cheddar, Swiss, or feta, for a simple and delicious meal.
Vegetable Omelette: Add a variety of sautéed vegetables like bell peppers, onions, spinach, and mushrooms for a nutritious and flavorful omelette.
Denver Omelette: Fill the omelette with diced ham, bell peppers, and onions for a hearty and satisfying breakfast.
Omelettes are a simple yet delicious option that can be enjoyed in countless ways. With these easy steps, you'll have perfectly cooked omelettes ready to enjoy in no time. Happy cooking!

So there you have it: five ways to take the humble egg and turn it into breakfast, lunch, dinner, or a quick snack. We've covered the portable perfection of the Hard Boiled Egg and the dipping decadence of the Soft Boiled Egg. We then tackled the fluffy versatility of Scrambled Eggs, the sunny simplicity of the Sunny Side Up, and the customizable finesse of the Omelet.
The egg truly is the ultimate all-in-one food. Whether you need an elegant runny yolk for your toast or a quick, solid protein bomb for your lunch bag, the skills here will carry you through countless meals. Now that you're armed with the basics, your breakfast game is officially upgraded. Go forth and cook!